man-in-the-middle-attack
For this challenge, players were given a DNS server address (192.168.153.10) and a website (http://valentine.com) which is also accessible with (192.168.153.10). The first step was to connect to the previously cracked Wi-Fi network and set this DNS server as the primary one. Additionally, the victim’s IP address (192.168.153.30) was provided, giving a crucial clue about the target.
Analyzing the Task
At first glance, one might assume this challenge involves web exploitation, such as attacking the login page. However, that’s a red herring — this is a network-based challenge, and testing the login form won’t lead anywhere. Instead, the task description hints that the victim frequently visits the website, suggesting that intercepting their traffic might be the key.
Inspecting Network Traffic
Firing up Wireshark, we apply a filter to monitor traffic from the victim’s IP:
ip.addr == 192.168.153.30Surprisingly, all we see are mDNS packets, which aren’t useful for our goal. Why? Because WPA2 encryption ensures that communication between the victim and the server is secure, preventing passive eavesdropping. This means we can’t simply sniff the victim’s HTTP requests directly.
Performing an ARP Poisoning Attack
Since passive sniffing is ineffective, we need another approach: a Man-in-the-Middle (MITM) attack. But before diving into the attack, let’s quickly go over how devices forward traffic using ARP (Address Resolution Protocol).
How ARP Works
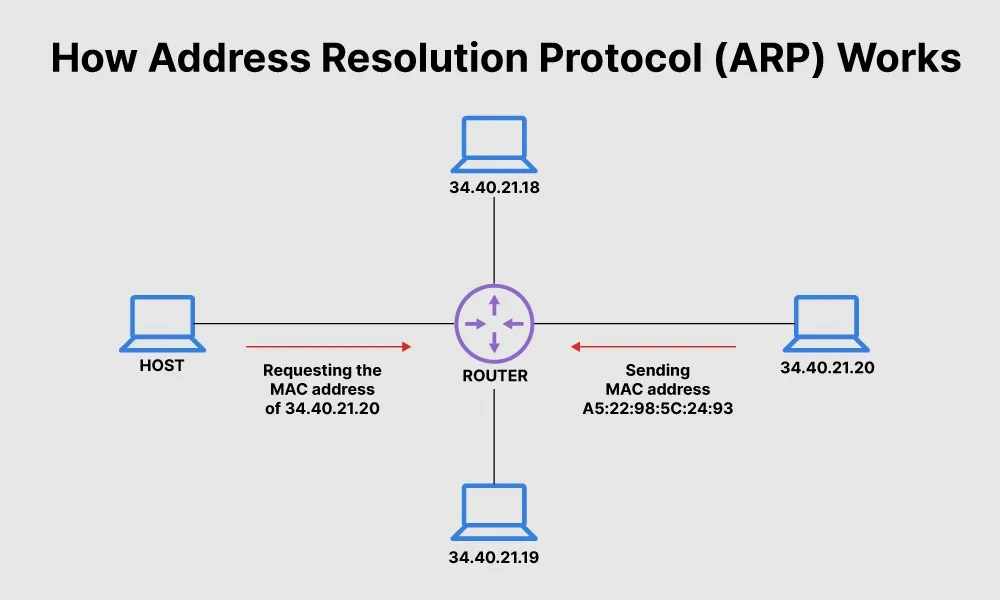
When a device wants to send data to another device on the same network, it first checks its ARP table for the corresponding MAC address. If the IP address isn’t in the table, it sends a broadcast ARP request, and the device with that IP responds with its MAC address. This allows proper packet forwarding within the local network.
What is ARP Poisoning?
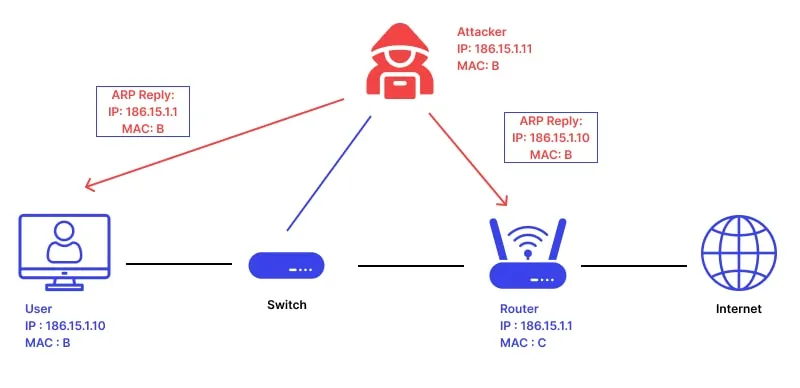
ARP Poisoning is an attack where the attacker spoofs ARP replies, making both the victim and the server believe that the attacker’s MAC address belongs to the other party. This way, all traffic between them is redirected through the attacker’s machine, effectively placing us in the middle of their communication.
Now, let’s execute the attack.
Step 1: Enable IP Forwarding
Since we need to relay traffic between the victim and the server, we must enable IP forwarding on our machine:
echo 1 | sudo tee /proc/sys/net/ipv4/ip_forwardThis ensures that traffic received from one party is forwarded to the intended destination instead of being dropped.
Step 2: Launch ARP Poisoning with Ettercap
There are multiple tools to perform ARP poisoning, but Ettercap is simple and comes pre-installed on Kali Linux.
- Start Ettercap and select the network interface.
- Scan for active hosts.
- Add 192.168.153.30 (victim) and 192.168.153.10 (server) to Target 1.
- Start ARP poisoning between them.
Once the attack is active, our machine will intercept all traffic between the victim and the website.
Step 3: Capturing HTTP Traffic
Now, we open Wireshark again and filter for HTTP traffic.
At first, there’s a flood of ARP packets — expected behavior, as our device keeps broadcasting spoofed ARP responses to maintain the MITM attack. But when we apply a “http” filter, we finally spot something interesting:
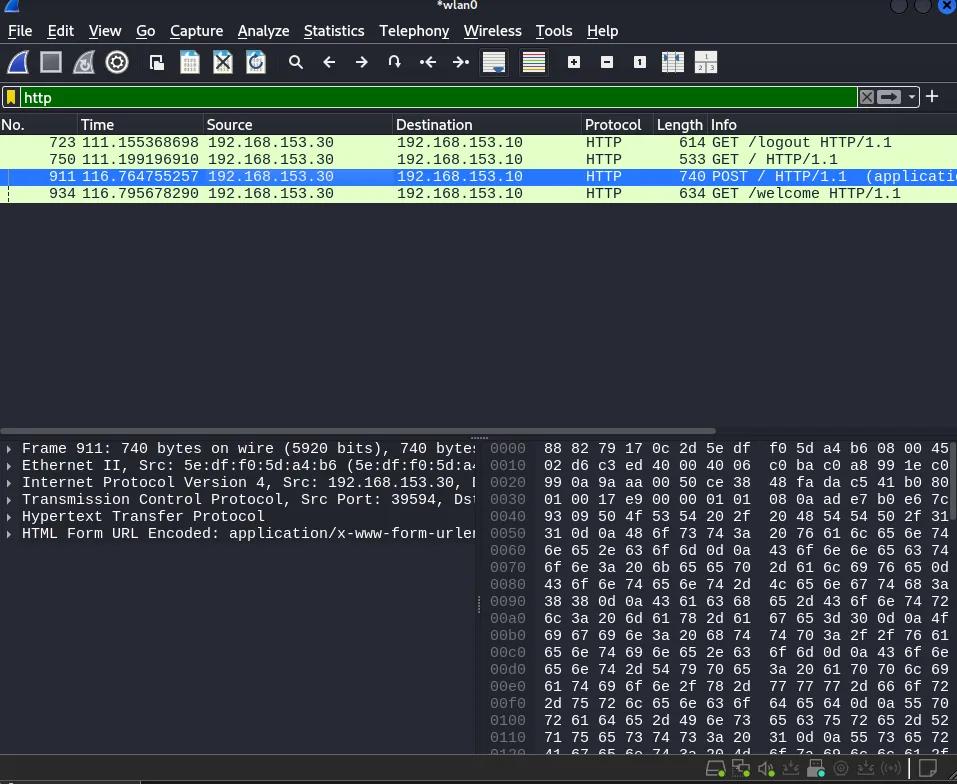
Intercepted HTTP POST Request
We see a POST request sent by the victim to http://valentine.com/login :
POST /login HTTP/1.1
Host: valentine.com
User-Agent: Mozilla/5.0 ...
Content-Type: application/x-www-form-urlencoded
Content-Length: 72

username=admin&password=5f4dcc3b5aa765d61d8327deb882cf99
The password appears to be a hash (5f4dcc3b5aa765d61d8327deb882cf99) but immediately after the login request, we see a server response:
GET /welcome HTTP/1.1
Host: valentine.com
Cookie: session=eyJ1c2VyIjoiYWRtaW4ifQ.Z72rgg.VonkdelMk5vsR2MddI8vAlWxId0
Here, we find something far more valuable: the session cookie!
Step 4: Hijacking the Session
Instead of cracking the password, we can bypass authentication entirely by using the captured session cookie. We simply add the cookie to our browser and visit http://valentine.com/welcome :
Cookie: session=eyJ1c2VyIjoiYWRtaW4ifQ.Z72rgg.VonkdelMk5vsR2MddI8vAlWxId0And just like that, we’re logged in as the victim! 🎉
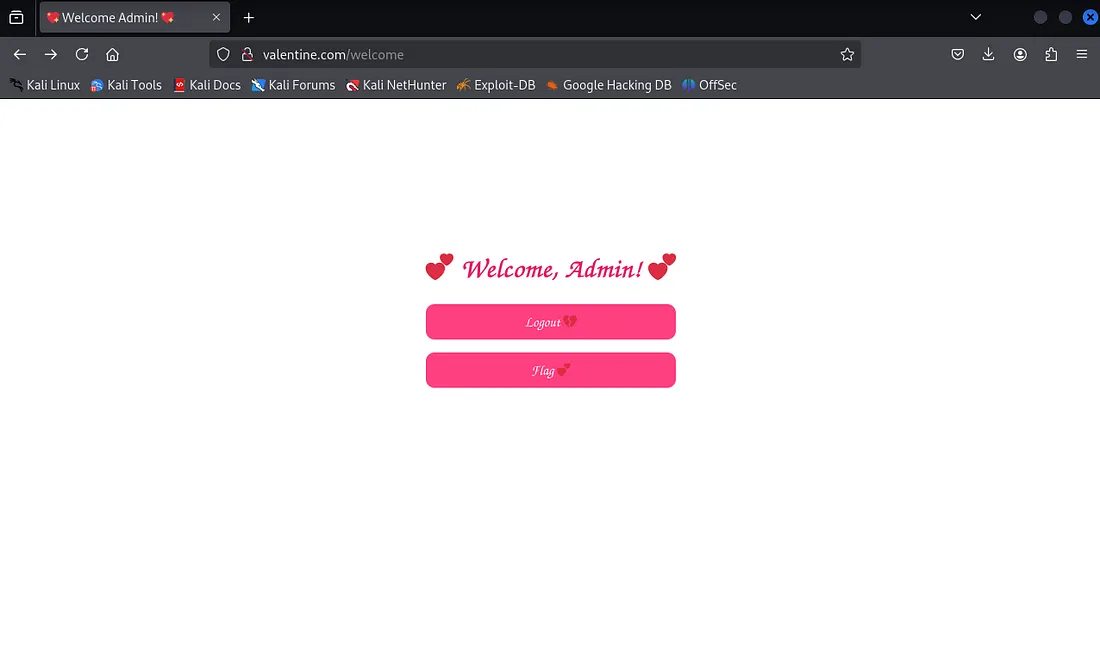
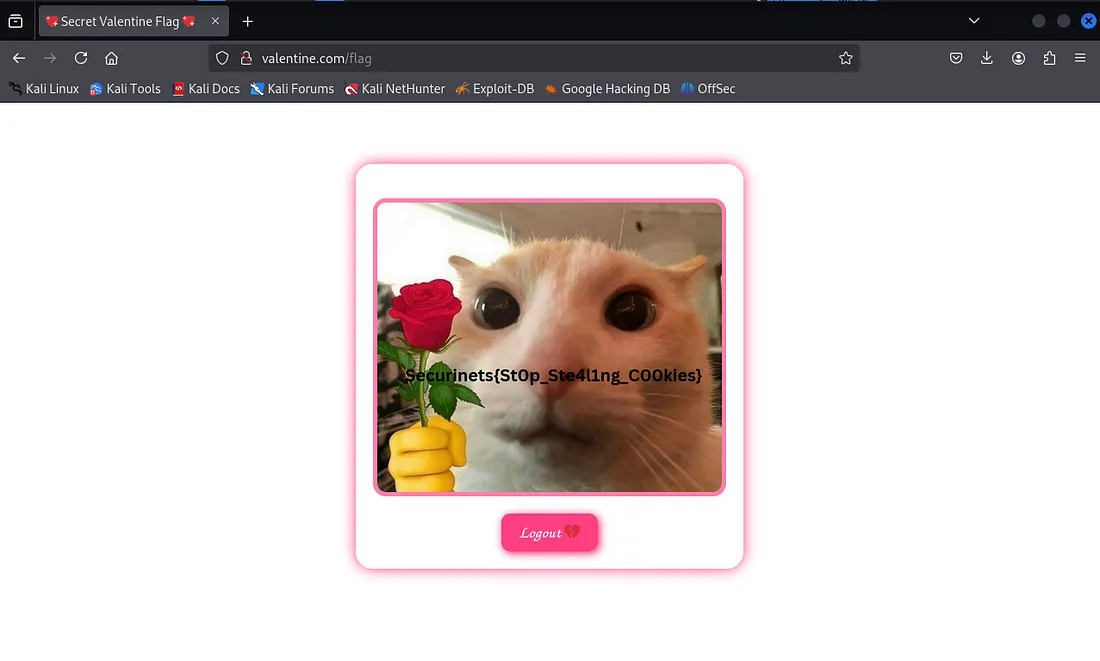
The flag can be obviously found when we click the “flag” button: